Connect to your Raspberry using Microsoft Remote Desktop

In this post, we’ll explain how to remotely connect to your Raspberry from a laptop using Microsoft’s Remote Desktop. The neat thing about this is that we then get a mirrored screen view of the Raspberry’s graphical user interface on our laptop. No need to connect our Raspberry to any TV, keyboard or mouse. You will love it!

What do you need to set up Microsoft Remote Desktop your Raspberry remotely?

  • First you need to have the Raspberry connected with an ethernet cable to the router of your home network. I other words, your laptop needs to be on the same network (wifi or ethernet) as the Raspberry.
  • Secondly, your Raspberry needs to be turned on (i.e. plugged in with a power adapter).
  • You need to be able to remotely control your Raspberry through the command line interface on your laptop (SSH). If you need guidance how to set this up, check out this post.

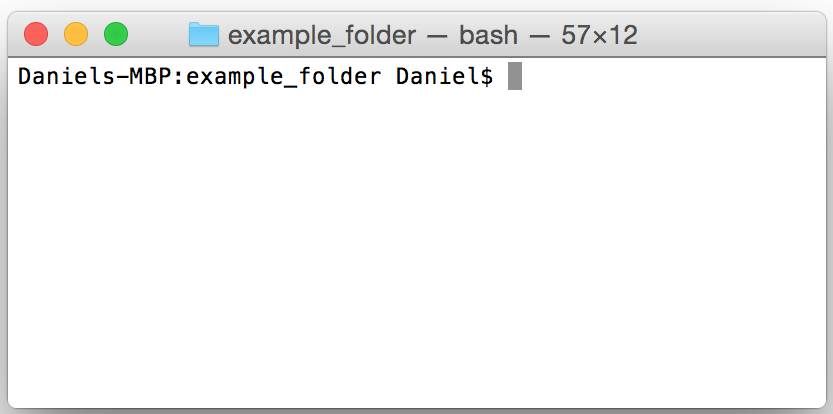
In order for your Raspberry and your laptop to communicate through a graphical user interface, we need to install a service on the Raspberry called xrdp. Your Raspberry needs to be connected to the internet. First, do a remote log in to your Raspberry using your command line interface on your laptop (we use Terminal on our Mac). Make sure you see the prompt of the Raspberry in Terminal. Next type ”sudo apt-get install xrdp” and press enter.

xrdp

Type ”Y” and press enter when you get the question to continue. The xrdp service will now be installed.

xrdp_installed

The xrdp is now installed. That’s it on the Raspberry side. Now we are going to install Microsoft’s Remote Desktop app on our Mac which we find on the Mac App Store here. Download and install the app. Open Microsoft Remote Desktop.

ms_remote_desktop

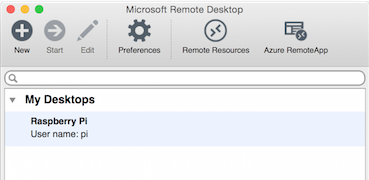
Click on ”New” and enter a connection name (we choose ”Raspberry Pi”), the IP number of your Raspberry, the user name ”pi” and the password ”raspberry” (assuming you haven’t changed the default user login configuration). You can leave the rest of the fields as they are.

ms_rd_configuration

Now, close the configuration window (click the red dot in the upper left corner). You should now have a new configured connection as the below screen.

ms_rd_new_connection

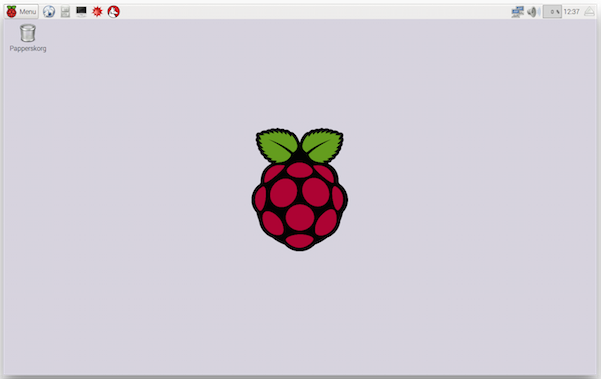
Double click on the new connection and the remote connection is established and you should get a screen image mirroring your Raspberry’s user interface. We know, it’s magic!

raspberry_ui

To quit the Remote Desktop session, slide the mouse pointer to the top of your screen so the tool bar of the Microsoft Remote Desktop app appears, click the Microsoft Remote Desktop menu and select quit.

With the two ways of remotely control your Raspberry, i.e. the Terminal or Remote Desktop, there is no need to occupy the TV from your girl friend, boy friend, kids, wife or husband anymore. In subsequent posts, we will almost always use any of these two ways to work with our Raspberry.

Remote command line access to Raspberry Pi

We assume you have your Raspberry Pi up and running and most likely connected to a TV or screen through an HDMI cable. In this post we’ll briefly explain how to access and control your Raspberry remotely without having to have your Raspberry connected to a TV or screen, without keyboard and mouse. If you need guidance how to set up your Raspberry for the first time, follow this simple instruction.

What do you need to access your Raspberry remotely?

  • First you need to have the Raspberry connected with an ethernet cable to the router of your home network. I other words, your laptop needs to be on the same network (wifi or ethernet) as the Raspberry.
  • Secondly, your Raspberry needs to be turn off i.e. plugged in with a power adapter.
  • You need to know the IP number of your Raspberry. In our case it’s 192.168.1.99. Yours could be different since it’s up to your internet router to hand out different IP addresses to all devices in your home network. The IP number is the identification number for sending data to and from devices on a network. One way to find out the IP number of your Raspberry is to log in to your network router and look at the list of the devices currently on your network. If you’re not able to find out the IP number of your Raspberry that way, we’ll go through another way below by using the command line terminal from your laptop.

Connect by using the command line terminal

In this post, we will remotely connect to the Raspberry from our laptop using the command line terminal (also known as SSH). This method is based on text commands. Simple, boring but effective. On your Mac, open ”Terminal”. You find this by accessing the Launchpad, go to the Utilities folder and there it is. (If you’re using Windows, you can download a free SSH client from here)

terminal

If you’re not used to a command line interface (such as Terminal), it allows you to type in text based commands to control, configure and communicate. The text already appearing in the Terminal window is the name of the computer, the current folder you’re in, and the current user name. You type your commands after the $ sign. If you for example type ”ls” without the quotes and hit enter, you see a list of all files in the current folder ”example_folder”.

terminal_ls

Now, to remotely connect to our Raspberry, we type ”SSH pi@192.168.1.99” without quotes and hit enter. Your Raspberry has probably another IP address so replace 192.168.1.99 to match yours. If you haven’t yet, you can find out the IP number of your Raspberry by typing ”ping raspberrypi”. This outputs some information in the Terminal and one item is the IP number of your Raspberry. To stop the ping output, simply press ctrl + C.

terminal_pw

Our Raspberry asks us for the password of the user ”pi” which is the default user. The default password is ”raspberry”, so we type it in and hit enter. The terminal window will not add any characters or dots while we type the password like your might be used to from most login windows.

terminal_logged_in

Now you see the prompt ”pi@raspberrypi:~$”. Every command you type from here is executed on your Raspberry. Magic! If we now type ”ls” you list the files in the current directory on the Raspberry.

raspberry_ls

If you would like to exit the SSH connection with your Raspberry, simply type ”exit” and press enter, and you’re then back to your laptop’s prompt again. Executing a command now will be handled by your laptop and not your Raspberry.

Using the command line to remotely control your Raspberry is very effective and simple. There is a getting-used-to-text-command-time before you feel comfortable. If you after a while still prefers a graphical user interface, you should check out this post on how you remotely control your Raspberry from your laptop by mirroring the graphical user interface. It’s very simple as well!


Setting up your Raspberry Pi for the first time

Since you read this, you’re have probably bought a Raspberry Pi and are eager to get it up and running. We have tried to make a very simple step-by-step guide below to help you succeed.

What do you need?

raspberry_equipment

On our table we have the following items to bring our empty Raspberry to life:

  1. One Raspberry Pi 2 Model B
  2. One micro USB power adapter for powering the Raspberry. Most standard 5 volt smartphone chargers would do. Ideally it should have capacity for 1.8 A or more.
  3. One MicroSD card (8GB recommended) and USB adapter for copying files to the card from you laptop.
  4. One USB keyboard
  5. One USB mouse
  6. One HDMI cable to plug your Raspberry into your TV or computer screen
  7. One laptop (in our case a Macbook Pro)

Start by downloading the operating system to your MicroSD card

Make sure your MicroSD card in empty and formatted as FAT32. Download the zip-file containing the operating system Noobs from this link (from www.raspberry.org) and save it to your laptop’s hard drive.

download_noobs

Unzip all the files and copy them to your MicroSD card.

unzipped_files

Plugging in your MicroSD into your Raspberry to start up

Before plugging in your Raspberry to your power adapter, insert your MicroSD card, plug in your keyboard, mouse, and connect the HDMI cable between your Raspberry and your TV or screen.

rasp_connections

Install the operating system

Now, plug in the power adapter and you should see the boot-up screen.

boot_up

Click the check box for Raspian and click install. Then click Yes. The process of installing the operating system takes a while. Be patient, it’s worth it!

Setting up the basics

From here we set the time and location. Click on the menu in the upper left corner and select Preferences->Raspberry Pi Configuration.

rasp_menu

If you select the tab Localisation, you can set your locale and timezone.

rasp_config

If you plug in an ethernet cable between your internet router and your Raspberry, you automatically get the correct time each time the Raspberry boots up. Having your Raspberry connected to the internet also enables you to get software updates and browse the internet from your Raspberry.

Where to go from here?

From here the possibilities are almost endless of what you can do with your Raspberry. We know, it feels a bit overwhelming. You can use it to create computer games, connect a camera module or have it be the brain in your home built drone. To get inspiration and guidelines, check out the project tutorials at www.raspberrypi.org/resources/make/ or follow our future posts as we build a system for monitoring and controlling your home in the spirit of Internet of Things.